You have Defender for Endpoint and alerts are generated. But now what? You don't want to be looking at the Defender for Endpoint dashboard all day. You can set up email notifications, and some teams even create a dedicated email address for this.
But email is not a modern way of working. Who likes email being a to-do list anyway?
A better solution is to get notifications in Teams, a place where you often live anyway. This blog will guide you through setting up this integration, using as little code as possible.
💡 TL;DR: Learn how to automatically post Microsoft Defender for Endpoint incidents to a Teams channel using Azure Logic Apps, Entra ID app registration, and the Microsoft Graph Security API. No coding required—just configuration. Takes about 30 minutes to set up.
Table of Contents
What You Need
To make this work you need:
- A Defender for Endpoint license. I've tested it with a P2 plan, but it should work with a Business license as well.
- Of course you need Microsoft Teams.
- You need an Azure environment and subscription to create a Logic App.
- You need permissions to create an app registration.
Entra ID App
The first thing we are going to do is create an app registration and give it the right permissions. This app registration will ensure we can poll the Microsoft Graph Security endpoints for new Incidents.
As with many Microsoft products, there are many ways to reach your destination. In this post I'm using an Entra ID app, but you could also use a Managed Identity. There is an excellent blog post here which details how to setup a Managed Identity and use it to connect to the Microsoft Graph.
App registration
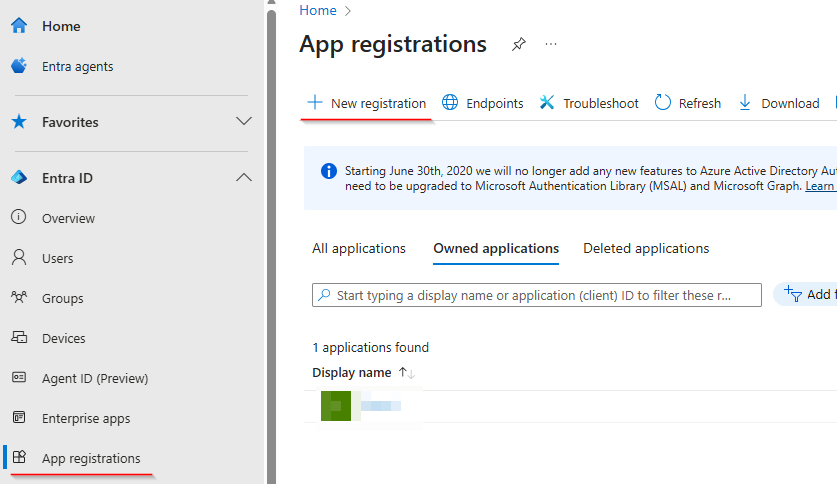
Go to Entra ID (https://entra.microsoft.com/) and choose App Registrations in the menu on the left and click New Registration.
Give the app a descriptive name:
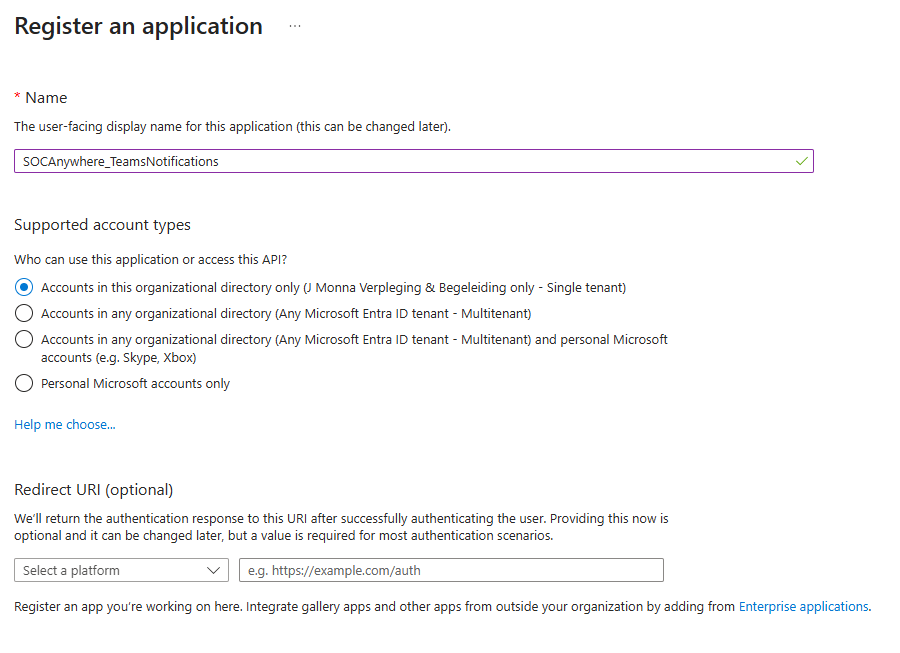
And click register.
Now the app is registerd and we can setup the right permissions and secrets.
Setting permissions
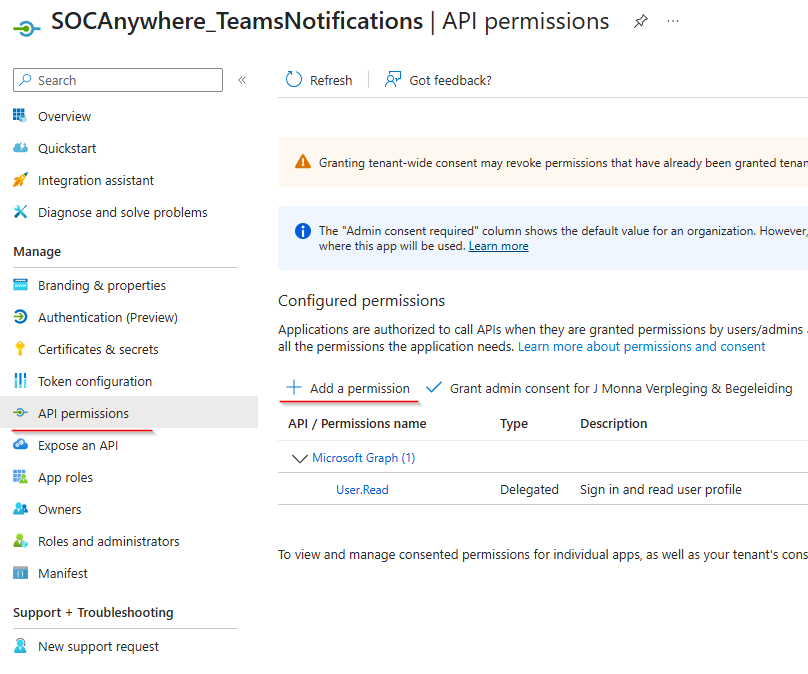
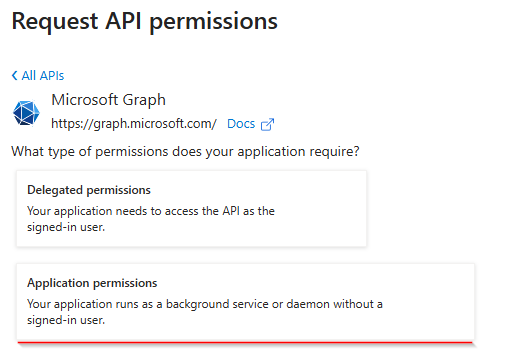
This newly create app needs to have the right permissions to be able to access the security endpoint of the Microsoft Graph API. Go to API permissions and click Add a permission.
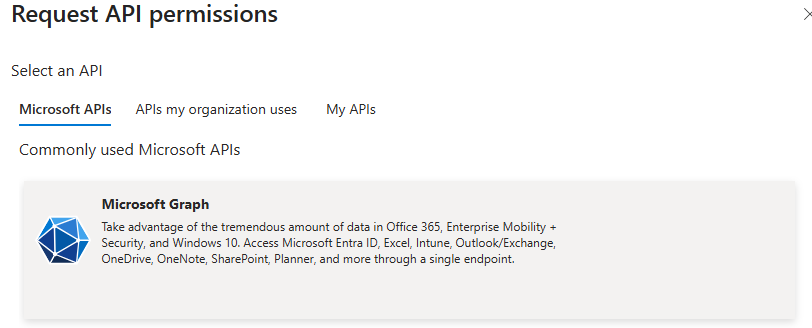
Pick the Microsoft Graph:
And choose Application permissions:
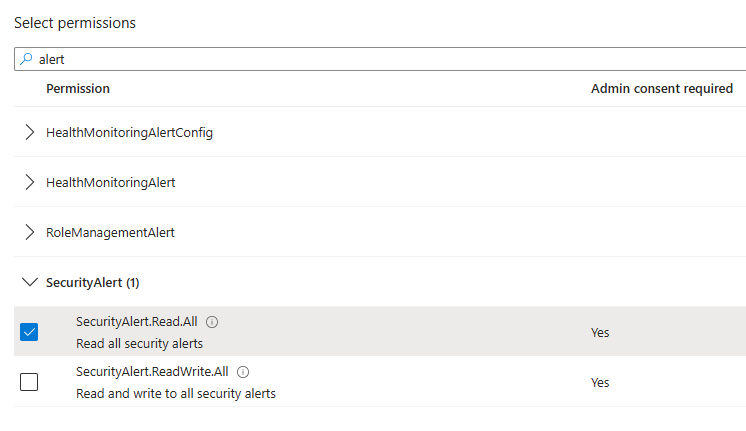
In the textbox, type incident and slect the SecurityIncident.Read.All permission:

Now where here, ptionally do the same for alerts, you might need this in the future:
In the textbox, type incident and slect the SecurityIncident.Read.All permission:
AFAIK you cannot grant application permissions to post messages in Teams using this method.
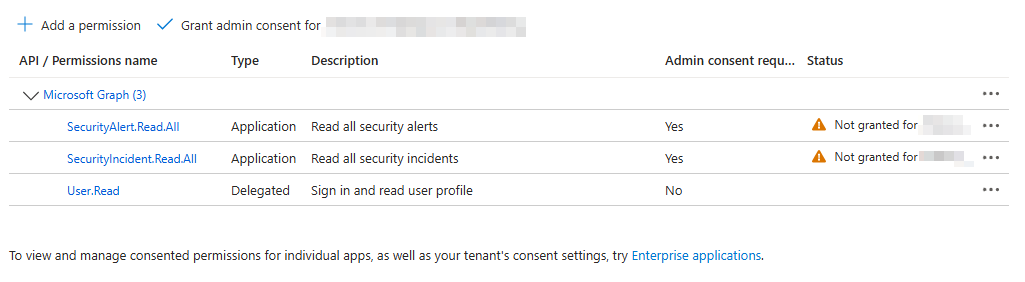
Save these permission.
These permissions need consent by an administrator. Click Grant admin consent to grant these permissions:
Creating a secret
To connect using the application we need to generate a secret. When storing this secret be sure to store in a safe location. A password manager is a good place and Azure Key Vault is also a good practice.
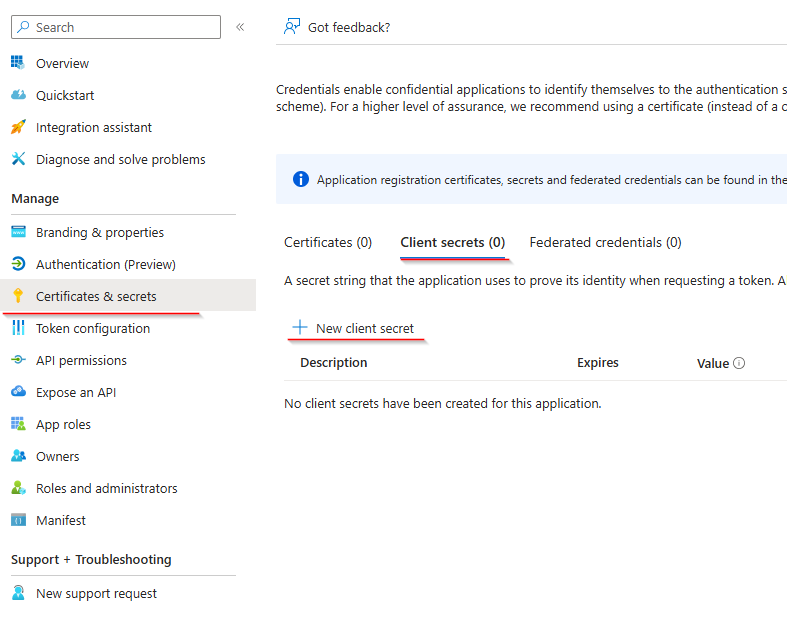
Give the secret a description and pick a time for when the secret expires. Please remember to add this to your calendar, because you will not get notified when it expires.
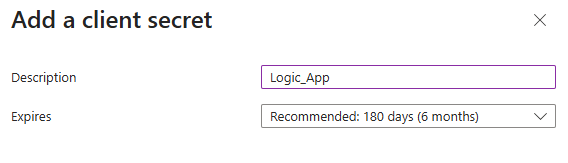
Notice that this secret will only be shown once. If you move away from this page and haven't saved the secret, you need to recreate one.
ClientID
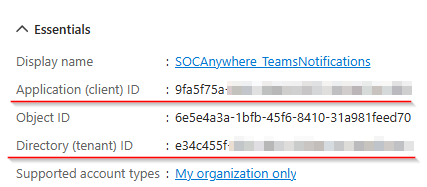
Click on overview and write down the Application (Client) ID and the Directory (tenant) ID. We need this when setting up the logic app.
Logic app
Now that we have an app registration, we can connect to the Microsoft Graph API as an application. The next step is to create a Logic App in Azure to poll the Incident endpoint for new Incidents.
In portal.azure.com create a new resource (maybe put it in a new Resource Group as well for management purposes).
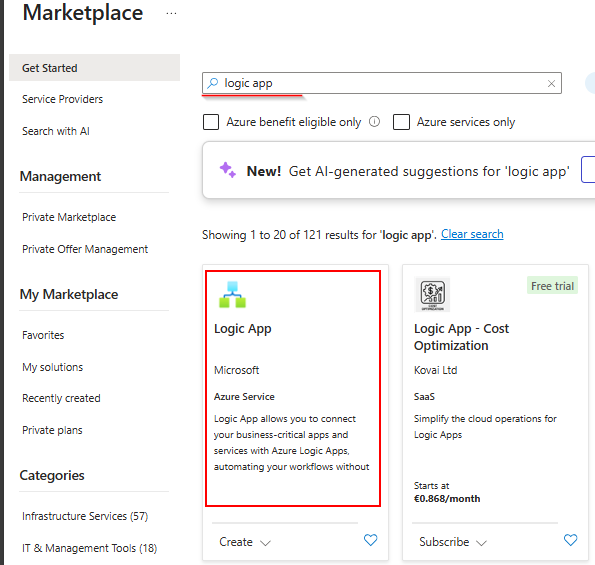
Type Logic App and click create on the Logic App.
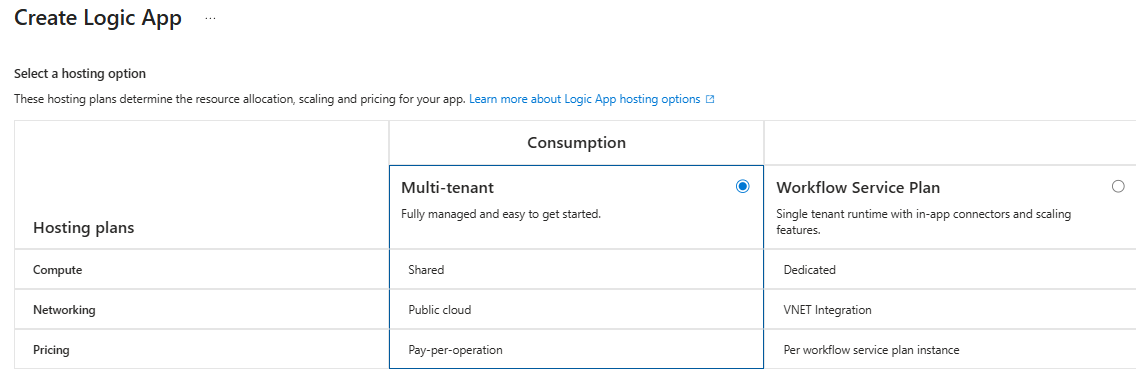
On the next screen pick you subscription and click Create. For cost purposes I would choose a Consumption plan. A Workflow Service Plan is likely more expensive but could deliver more security with private networking.
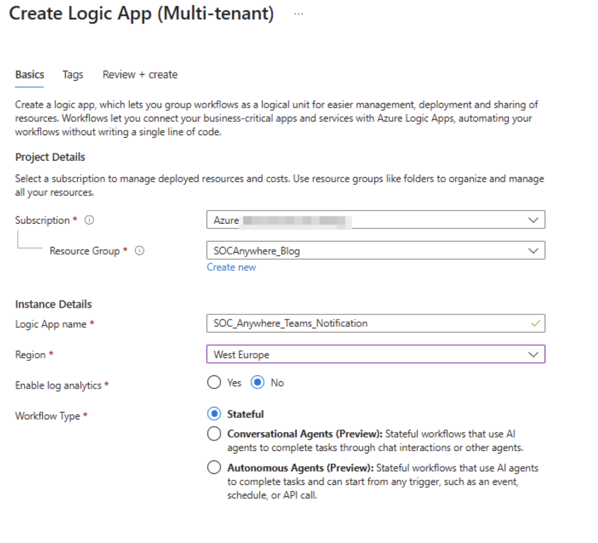
Give your resource a descriptive name and pick the region where you want to deploy this Logic App:
Designing the Logic App
After the deployment of the Logic App has finished, you can easily go the the deployed resource. Otherwise you can look it up in the search bar.
A Logic App is Azure's workflow automation service that allows you to visually design integrations between hundreds of different apps and services without writing code. Similar to Power Automate (formerly Microsoft Flow), it provides a drag-and-drop interface to create automated workflows with triggers, conditions, and actions. Logic Apps are particularly useful for enterprise scenarios as they offer advanced features like error handling, parallel processing, and seamless integration with Azure services.
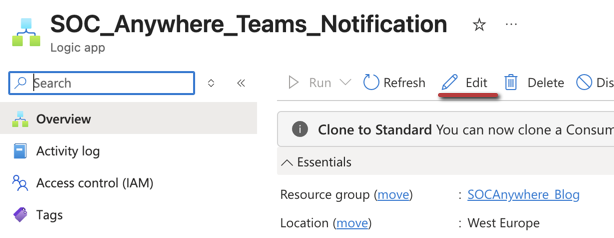
On the Logic App start screen, click Edit to start editing:
Trigger
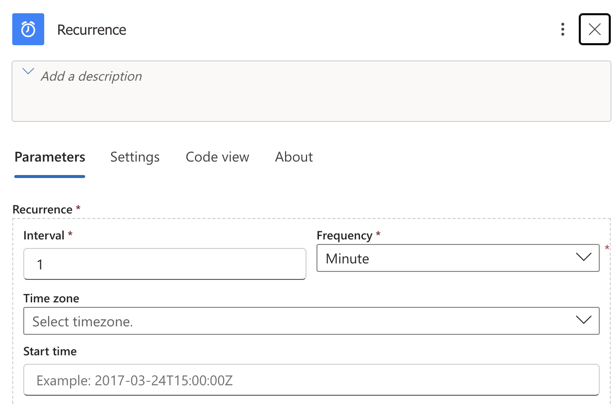
A Logic App needs a trigger to start. There are multiple options for a trigger, like an incoming webhook, but for this Logic App we are goint to use a schedule trigger. One than runs every (several) minute(s).
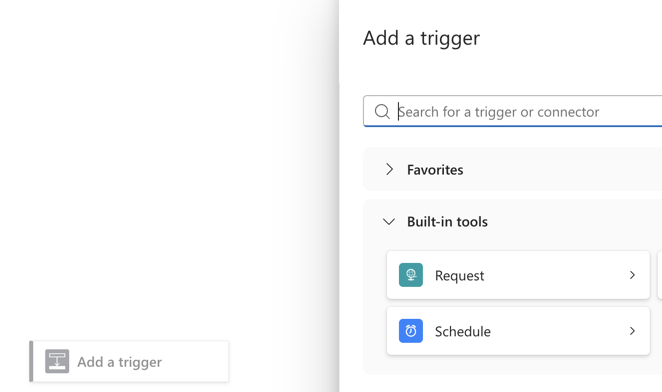
Choose the recurrence trigger, and pick a recurrence interval that fits your needs. Be aware that you pay for every run of this logic app. For this demo, I'm choosing once every minute, which will result in 1.440 runs a day.
Http Get request
Now we need to get the data from the security endpoint of the Microsoft graph. We will use a Http request to do this.
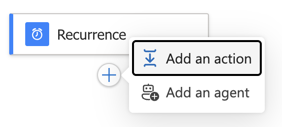
Click the Plus icon below the Recurrence trigger and add an action:
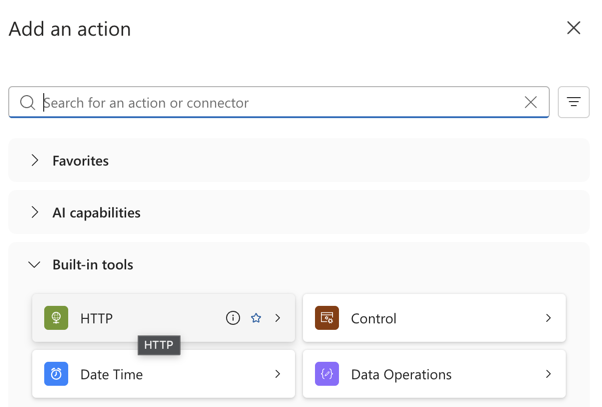
Pick the Http action, and pick Http again in the next screen:
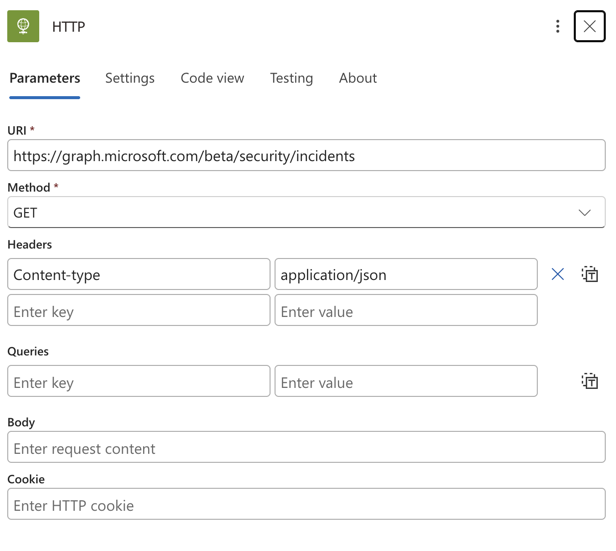
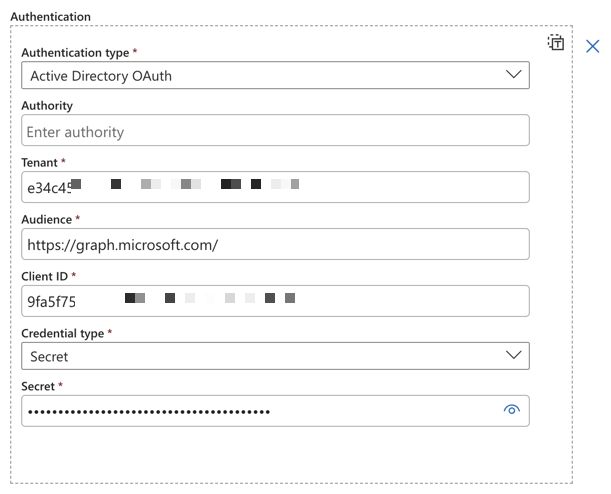
Configuring the Http action, we need the following settings:
- URI: https://graph.microsoft.com/beta/security/incidents?$filter=createdDateTime ge @{formatDateTime(addMinutes(utcNow(), -1), 'yyyy-MM-ddTHH:mm:ssZ')}
- Method: GET
- Headers: Key: Content-type and Value: application/json
- Click Advanced paramaters and check Authentication
- Authentication type: Active Directory OAuth
- Authority: This can remain empty
- Tenant: The tenant ID from one of the first steps
- Audience: https://graph.microsoft.com/
- Client ID The client ID from the same step
- Credential Type: Secret
- Secret: The secret you securely stored
Parse Json
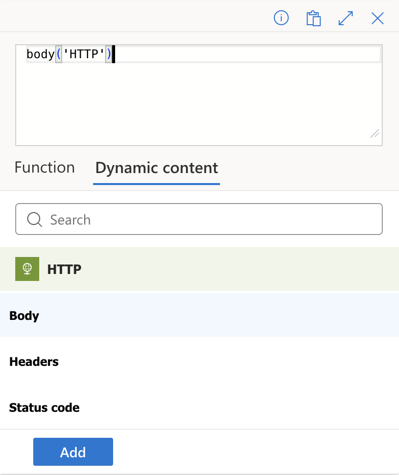
The result of the Http get request, if successfull, wil be a json with on or more incidents We need to parse this result so we can use it further along in the Logic App.
Add an action and search for Parse JSON:

In the Content input, click on the fx icon that appears. Then click Dynamic Content and pick the Body property.
In the Schema input paste this JSON schema for the Incident endpoint:
{
    "type": "object",
    "properties": {
        "@@odata.context": {
            "type": "string"
        },
        "value": {
            "type": "array",
            "items": {
                "type": "object",
                "properties": {
                    "id": {
                        "type": "string"
                    },
                    "tenantId": {
                        "type": "string"
                    },
                    "status": {
                        "type": "string"
                    },
                    "incidentWebUrl": {
                        "type": "string"
                    },
                    "redirectIncidentId": {},
                    "displayName": {
                        "type": "string"
                    },
                    "createdDateTime": {
                        "type": "string"
                    },
                    "lastUpdateDateTime": {
                        "type": "string"
                    },
                    "assignedTo": {
                        "type": "string"
                    },
                    "classification": {
                        "type": "string"
                    },
                    "determination": {
                        "type": "string"
                    },
                    "severity": {
                        "type": "string"
                    },
                    "customTags": {
                        "type": "array",
                        "items": {
                            "type": "string"
                        }
                    },
                    "systemTags": {
                        "type": "array"
                    },
                    "description": {},
                    "recommendedActions": {},
                    "lastModifiedBy": {
                        "type": "string"
                    },
                    "resolvingComment": {
                        "type": "string"
                    },
                    "summary": {},
                    "comments": {
                        "type": "array",
                        "items": {
                            "type": "object",
                            "properties": {
                                "comment": {
                                    "type": "string"
                                },
                                "createdByDisplayName": {
                                    "type": "string"
                                },
                                "createdDateTime": {
                                    "type": "string"
                                }
                            },
                            "required": [
                                "comment",
                                "createdByDisplayName",
                                "createdDateTime"
                            ]
                        }
                    },
                    "recommendedHuntingQueries": {
                        "type": "array"
                    }
                },
                "required": [
                    "id",
                    "tenantId",
                    "status",
                    "incidentWebUrl",
                    "redirectIncidentId",
                    "displayName",
                    "createdDateTime",
                    "lastUpdateDateTime",
                    "assignedTo",
                    "classification",
                    "determination",
                    "severity",
                    "customTags",
                    "systemTags",
                    "description",
                    "recommendedActions",
                    "lastModifiedBy",
                    "resolvingComment",
                    "summary",
                    "comments",
                    "recommendedHuntingQueries"
                ]
            }
        }
    }
}
Foreach loop
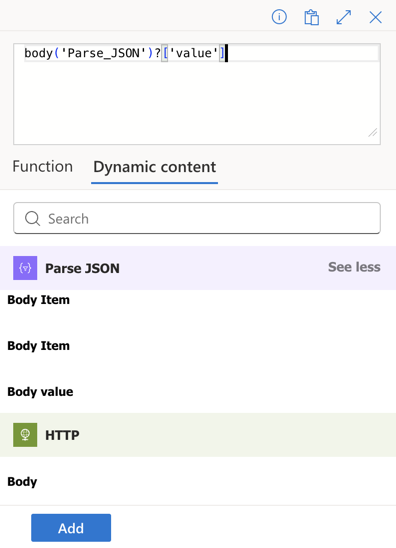
As there might be more than one incident that requires a message in a teams channel, we need to loop through all the incidents that the Http get request fetches from the Graph API. Add the Foreach action to the Logic App.

Now we need to iterate over the Body Value property. Click in the textbox and then on the fx icon that appears. Pick Dynamic Content and yoy might need to click See more
Teams card
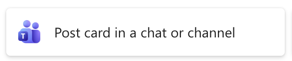
We are on to our last step, posting the incident in a teams channel. Click Add an action in the for each loop and search for Post card in in chat or channel.
Configure the Teams action to your need by picking the right team and channel. For the Adaptive card JSON, you can use the sample below.
{
  "$schema": "http://adaptivecards.io/schemas/adaptive-card.json",
  "type": "AdaptiveCard",
  "version": "1.4",
  "body": [
    {
      "type": "TextBlock",
      "text": "Security Incident",
      "weight": "Bolder",
      "size": "Large",
      "wrap": true
    },
    {
      "type": "Container",
      "items": [
        {
          "type": "FactSet",
          "facts": [
            {
              "title": "Title:",
              "value": "%%IncidentTitle%%"
            },
            {
              "title": "Severity:",
              "value": "%%Severity%%"
            }
          ]
        }
      ]
    }
  ]
}
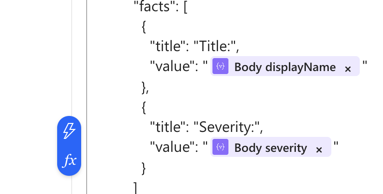
Replace the %%IncidentTitle%% and %%Severity%% with Dynamic content.
To do so, remove these placeholders and click on the Fx button again. It should look something like this in the end:
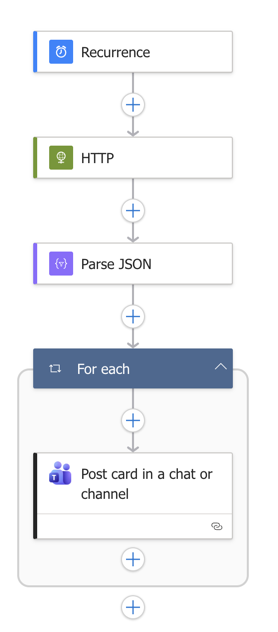
Complete Logic App Flow
Here's what your complete Logic App workflow should look like with all steps connected:
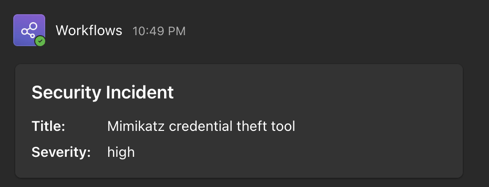
Final result
When everything is done and working correctly, this should be the end result:
This gives you the option to get notifications in a place where you are already working and being able to discuss any notifications within your team. And putting in a bit more effort, you can likely create better cards with e.g. a link to the incident in the Defender portal. A nice addition to this way of working is that you get notifications on your phone when there are new security incidents in the Defender for Endpoint portal.
💰 Cost & Performance Considerations:
- Logic App Costs: On a Consumption plan, expect ~$1-5/month depending on polling frequency
- Polling Frequency: I recommend 5-10 minutes for active environments, 30-60 minutes for quieter ones
- Security: Store your client secret in Azure Key Vault for production use instead of directly in the Logic App
Troubleshooting Common Issues
403 Forbidden Error
If you receive a 403 error when testing the HTTP action, ensure that admin consent was granted for the API permissions. Go back to your app registration and verify the status column shows "Granted" in green.
Parse JSON Schema Errors
If the Parse JSON action fails, the Microsoft Graph API response format may have changed. Click "Use sample payload to generate schema" and paste a fresh response from the Graph API endpoint to regenerate the schema.
No Incidents Appearing in Teams
Check the Logic App run history to see if incidents are being returned. You may need to adjust the filter in your HTTP request URI or verify that you actually have active incidents in Defender for Endpoint.
Authentication Failures
Double-check that your Tenant ID, Client ID, and Secret are correct. Remember that secrets expire—you'll need to renew them and update your Logic App before expiration.
Conclusion
You've now set up an automated workflow that posts Defender for Endpoint incidents directly to Microsoft Teams. This gives your security team instant visibility without constantly checking the Defender portal or drowning in email alerts.
This approach works well for small to medium teams that already live in Teams. However, keep in mind the limitations: you're polling at intervals (not real-time), managing secrets manually, and the adaptive cards are basic. For more advanced use cases, you might want to explore webhooks or dedicated security orchestration tools.
Next steps you could explore: add filtering by severity, include more incident details in the card or add action buttons to assign incidents directly from Teams.
About the Author: we're building SOC Anywhere, a mobile-first security operations platform designed for teams without 24/7 SOCs. We've spent years working with Microsoft security tools and helping SMEs improve their security posture without enterprise budgets.
Get Better Defender Notifications
While Teams can work for notifications, SOC Anywhere provides a purpose-built platform for security operations with mobile-optimized incident triage.
Try it for free — no credit card needed