Most organizations and teams that have Defender for Endpoint don't have the time to look at the dashboard all day to see if there are any new notifications. Unfortunately, Defender for Endpoint is not a set and forget kind of tool. If you want to get the most out of the product and if you want to ensure your environment is safe, you need to check the incidents and alerts on a regular basis.
We already have a blog on how to receive notifications in a Teams channel. Depending on your workflow or the workflow of your team, you might want to receive these notifications on email. You could use the same logic as with the Teams integration and send out emails. However, in this blog we will explore setting up the default email notification in Defender for Endpoint.
💡 TL;DR: Learn how to configure built-in email notifications in Microsoft Defender for Endpoint. No code required—just navigate to the Security Portal settings and configure notification rules for incidents, actions, and threat analytics. Takes about 10 minutes to set up.
Before you start
Before starting this setup, think about the email addresses you want to receive these notifications on. Things to consider:- Are you using your personal email? You will receive all alerts in your personal mailbox and although this might sound useful, it may also clutter your inbox. When you add multiple team members, do think about how you will manage sharing the responsibility of handling incidents.
- Setting up a shared mailbox? This will make sure your own, or your team members mailbox won't be cluttered with alert emails. It may also give you some sort of workflow. Unread alerts need to be handled, and read alerts don't need new attention. It does require strict discipline on keeping incidents unread. Another challenge might be that you won't receive email notifications on your phone or laptop. So you need to actively check the mailbox for new items.
- Integrating a mailbox into ITSM tooling? This feels like a more mature approach with proper handling of incidents. A shared mailbox is often a perfect way to send these alerts to tooling where ITSM processes can pick them and follow existing escalation rules.
Finding the setting
To setup the email notification in Defender for Endpoint, go to the Security Portal
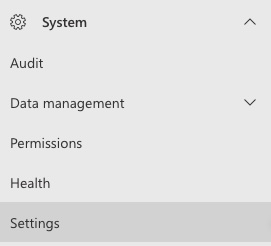
On the bottom left, expand System and click Settings:
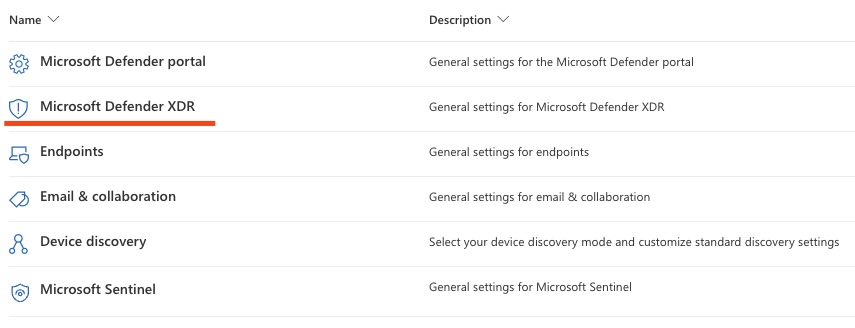
In this overview pick the Microsoft Defender XDR setting:
And there you will find the Email notifications setting:
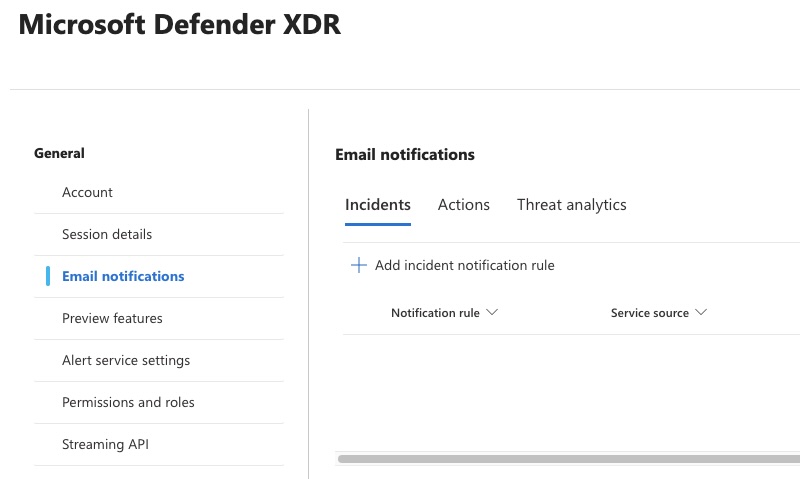
Here you can find three types of notifications:
- Incidents
This is the focus of this blog. This lets us create email notification rules when incidents are created or updated in the Microsoft Defender XDR portal. - Actions
Actions let you send email when manual or automated response actions occur. You get notified when remediation steps were triggered/completed/failed. - Threat analytics
With threat analytics notifications you receive emails when Microsoft publishes/updates relevant threat intel reports.
Adding a new notification rule
Click on Add incident notification rule (see previous screenshot).
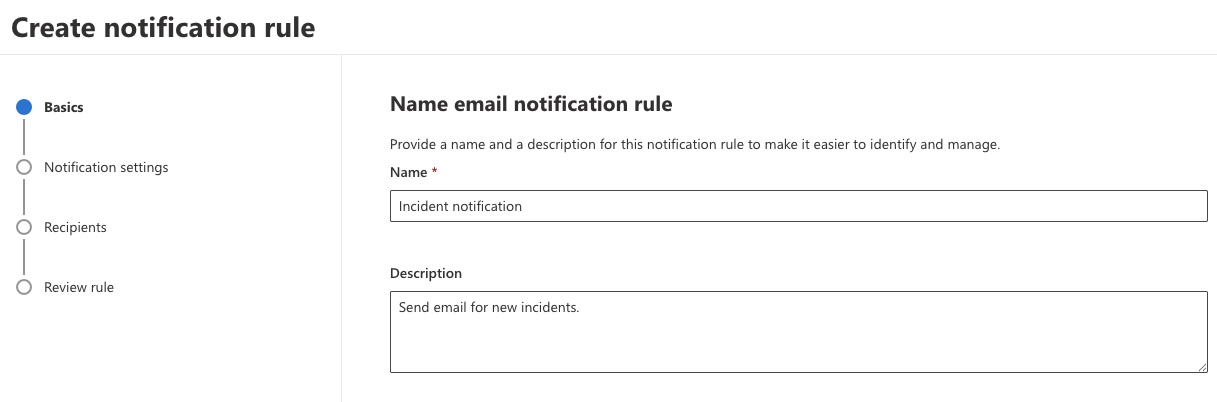
Give the rule a name and a useful description:
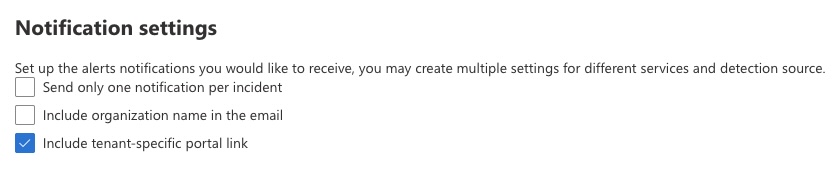
Click next and configure the notification settings. Having a tenant specific portal link in the email feels like something you want to have, to make the emails more actionable. The tenant name, is only relevant if you are an MSSP. And I would not recommend one notification per incident, as you would want to receive a new email when inicdents are updated.
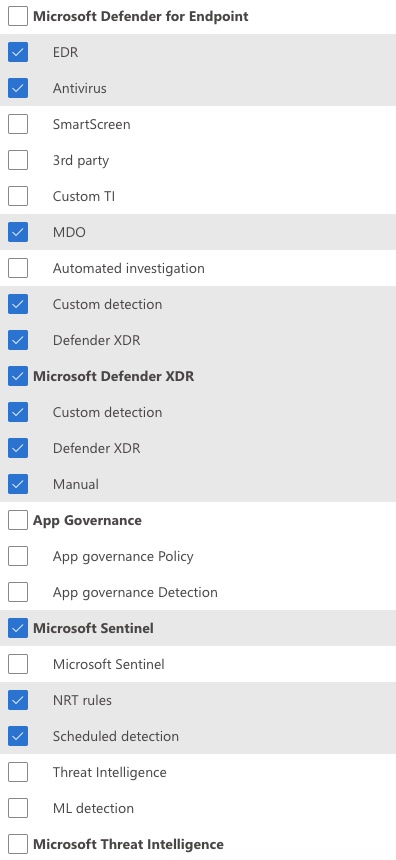
Picking sources and severity feels a bit more complex. Below is the list I came up with. The goal is to receive notifications when incidents occur that might create an adverse impact on the organization. Do check your own preferences. You could always enable them all and disable unwanted alerts later on.
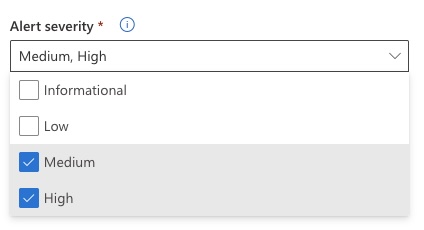
Next, pick the severity of the alerts you want to receive. From my experience this is a difficult one. Of course you would want to have high and likely medium as well. Especially high severity incidents require your attention and likely some manual intervention.
However, Defender XDR raises alerts and incidents for very serious activity on low and informational severity when it prevents some malware. In my opinion you still would want to investigate these as they can be quite serious. However, you will likely get annoyed with the many emails.
You are able to create a distinction between services and severity. So if you only want to receive High alerts from Sentinel and all alerts from XDR, it is possible.
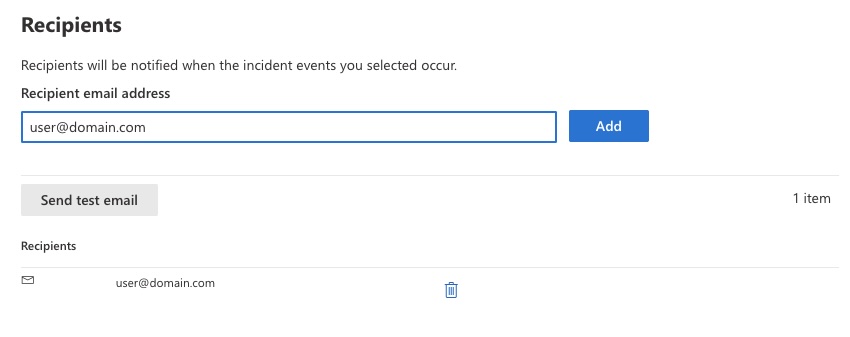
Next, add the recipient(s) of the email notifications. As you will be trusting this flow, it is wise to send the test email.
Click next and review your notification rule. If everything looks ok, click Submit and save your changes.
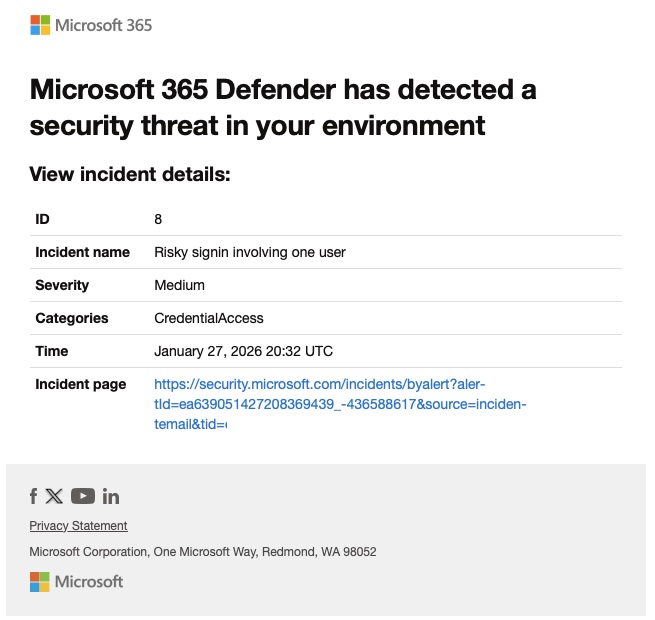
Result
When everything works you get email from Microsoft 365 Defender (defender-noreply[@]microsoft.com), looking something like this:
Conclusion
Email notifications in Defender for Endpoint are easy to set up and work well for many teams. However, if you want a more modern approach with better context and mobile-friendly incident triage, check out our Teams integration guide or SOC Anywhere.
About the Author: we're building SOC Anywhere, a mobile-first security operations platform designed for teams without 24/7 SOCs. We've spent years working with Microsoft security tools and helping SMEs improve their security posture without enterprise budgets.
Get Better Defender Notifications
SOC Anywhere gives you real-time notifications with full incident context, related incidents, and playbooks—all optimized for mobile. No Logic Apps required.
Try it for free — no credit card needed